

How To Use Rank Tracking To Optimize Merch by Amazon Listings
How To Use Rank Tracking To Optimize Merch by Amazon Listings
This post is also available in:  German
The vast majority of Merchers use a spray and pray approach when it comes to uploading shirts. You upload your limit of shirts, and hope something sells.
This CAN work, but over the years it has gotten hard and harder, making research even that more important.
But…
Let’s say that you went through all the research steps, found a good subniche where there are buyers for your shirt designs, and you know what makes up a good design! All that is left is to list it right?
Yes and no!
The first step is listing it, using keywords in your title, bullet points and description to make a great listing for a customer. However, if you want to have a design catalog with thousands of designs that are selling monthly (and not just hoping someone buys it), then you NEED to keep an eye on your listings to optimize keywords in order to push your shirt up the rankings. The higher ranked your shirt is for specific keywords, the more sales you will make and the more royalties will flow into your account.
This works great for new listings, but also is important and something to keep in mind with sellers that you think you can grab some more volume from.
If you want to follow along in this guide and do NOT have Merch Informer, make sure to grab the 7 day free trial here: https://members.merchinformer.com/trial (no credit card required) so that we can start optimizing your shirts.
Optimizing a Merch T-Shirt Design
Keywords are what make this business go round! The better placed your keywords are, the more visibility they will have with the audience that will buy your shirts.
If you have a great design but do not take the time to optimize anything, you might be stuck at the back of 50,000 other designs with no way to get seen. The best thing for you to do if you are in this position is actually go watch the video in this post which lays out how to get started:
How to Keyword Merch Listings
Once you have a good understanding of how this all works, we can start actually optimizing the listings.
Step 1: Adding Designs
The first thing you want to do is make sure you have a Merch Informer account, so go ahead and log into that.
From the left hand corner menu, select the Merch Tracker. This handy little module will let you track your designs and keywords across Amazon. This will allow us to figure out where we are ranking so that we can make the appropriate changes in order to boost our position.
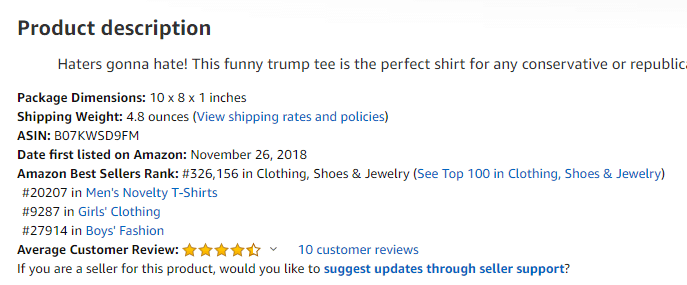
Go ahead and add the ASIN of one of your designs to the ASIN box. If you do not know where to find this, you can open up any Merch by Amazon t-shirt, scroll down to the product details, and then copy and paste the ASIN inside of Merch Informer:
I have selected a trump design to illustrate how this works for example purposes. We are using this design because the seller is missing out on a lot of opportunity here. Enter in the ASIN into Merch Informer:
![]()
Go ahead and click save and you will get a notice that it has successfully been added:
Step 2: Adding Keywords
The second step to this is adding some keywords. First though, lets break down all the functionality to get you used to using the tool.
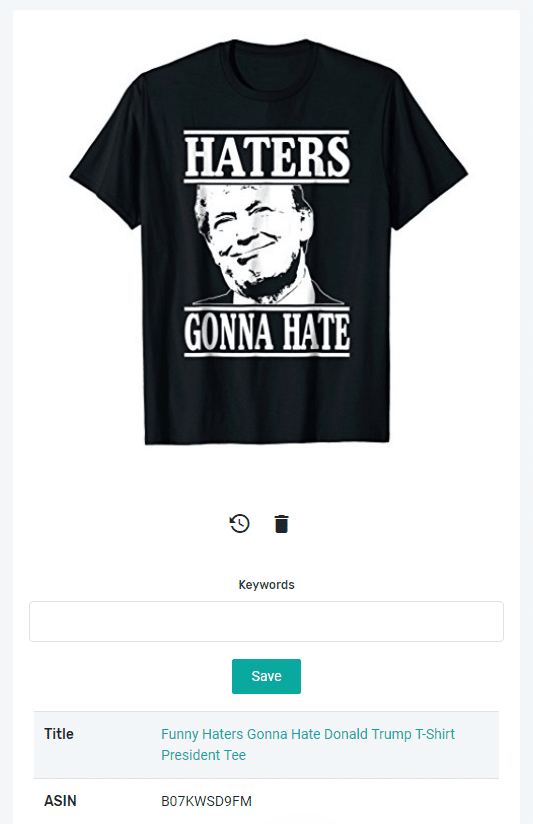
When you first add a design to the tool you will see the design itself, a little clock, a trashcan, and the title, ASIN and keywords slot.
The little clock icon will track this design over time to show you sales rank and pricing. The trashcan will remove it from the list. The longer you keep tracking your designs, the more data you will have to actually optimize your listings!
What is really important here are the keywords.
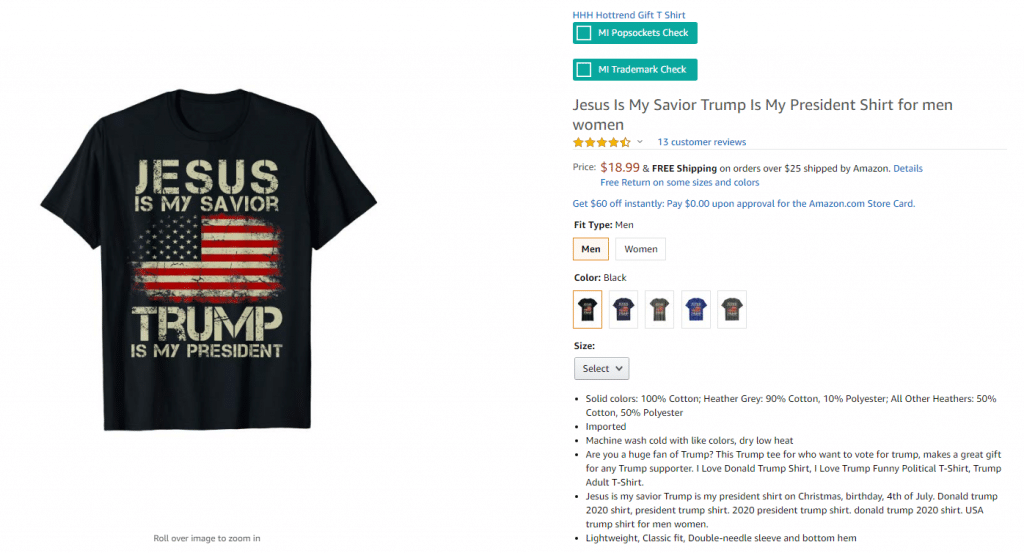
Here is the listing of the design that we added:
You can tell it has some decent keywords in there, and it looks like the design in question has 10 customer reviews (ASIN screenshot above). However, this seller is leaving a LOT of money on the table by not actually optimizing this listing.
Head on over to the product search inside of Merch Informer and look up the keyword “Trump” and you will see what I mean.
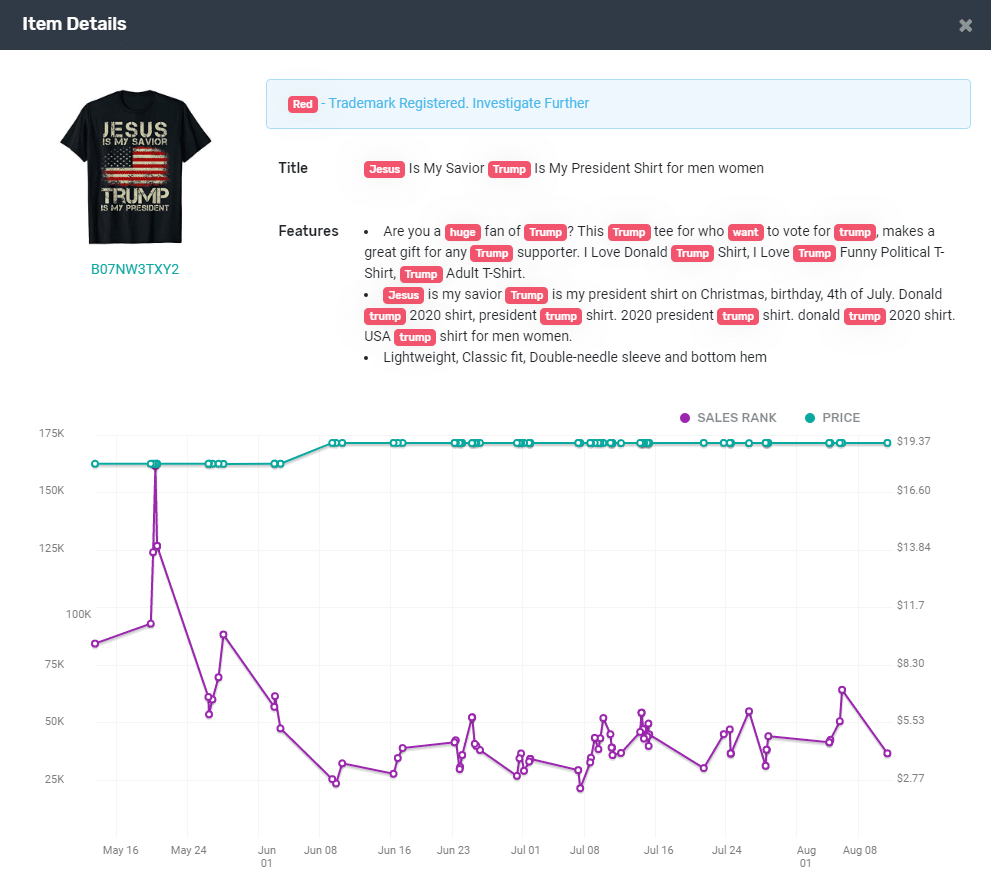
You can get to this screenshot by clicking on the little “i” icon under the product.
You will see that this shirt not only is priced higher, but it is selling a LOT.
Take a look at their listing:
What you should be doing is figuring out WHAT keywords in these other listings are doing well for these designs, and we will try and incorporate them into our listing after we track them to figure out what is going on.
So now, let’s add some keywords to the original listing that we put into the tracker.
The first thing I like to do is actually look at any reviews and see if there are any keywords THERE that we could possibly add to the listing.
It looks like there is:
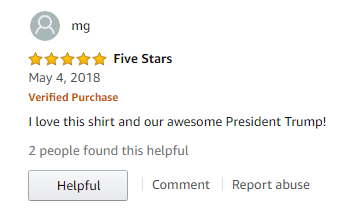
Right there in plain site we see the keyword “president trump”, yet somehow this is NOT included in the listing for the shirt we are going to track. I also notice in these other listings the following keywords:
- donald trump shirt
- president trump
- trump 2020
- trump is my president
- trump supporter
So start by adding these to the keywords inside of Merch Informer.
When you first add them, they will look like this:
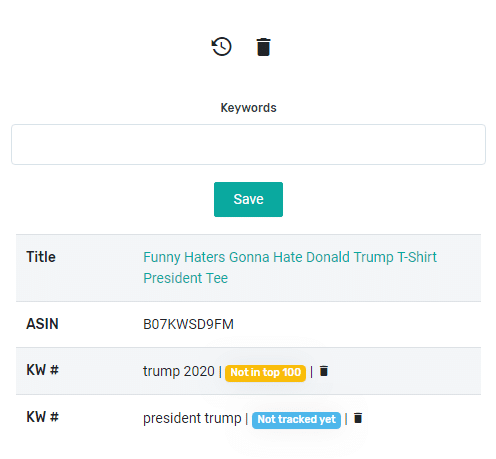
If a keyword has not been tracked, you will want to click on the “not tracked yet” button which will give you a rank for the design on Amazon.
After adding all the keywords, we have this:
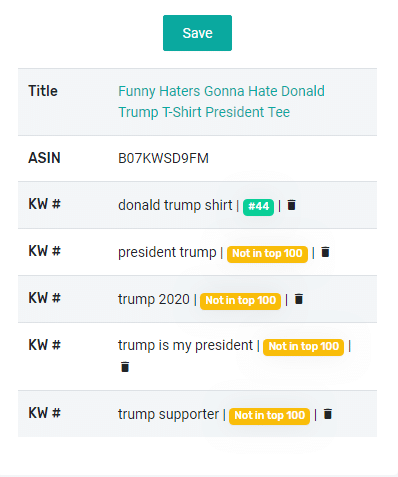
Only a single keyword out of the ones we are tracking is ranking (and not very good ranking at that). The rest are not even in the top 100 results! This means that this seller is leaving probably a good $1000+ a month on the table, because they are not taking the time to optimize the listing.
So, lets optimize!
Step 3: Optimizing the Merch by Amazon Listing
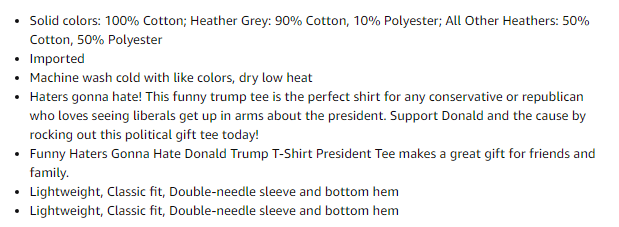
Here are the two bullet points in the design we are tracking:
- Haters gonna hate! This funny trump tee is the perfect shirt for any conservative or republican who loves seeing liberals get up in arms about the president. Support Donald and the cause by rocking out this political gift tee today!
- Funny Haters Gonna Hate Donald Trump T-Shirt President Tee makes a great gift for friends and family.
These are “okay” but the goal here is to actually get some of the keywords that we are tracking into these bullet points AND the title where it makes sense. If Amazon sees these keywords in the right spots (where it makes sense of course) then they will slowly move the shirt up the rankings.
Here is the title of the design:
- Funny Haters Gonna Hate Donald Trump T-Shirt President Tee
First, let’s tackle the title.
The title by itself is good, but I want to put 1 keyword in there.
From our list of tracking, we see that we have the keyword “president trump” but that is actually not together in any of the listing.
So, if I was this seller, I would make this small change to the title:
- Funny Haters Gonna Hate Donald Trump T-Shirt President Trump Tee
As you can see, all we did was add “trump” to the title, to make the full keyword president trump show up.
Now that the title is taken care of, lets move on to the bullet points. We have 4 more keywords to POSSIBLY use (there is no need to always use all of them. Using too many could make your listing look spammy).
- donald trump shirt
- trump 2020
- trump is my president
- trump supporter
Lets see if we can fit these into the bullet points. Look for the bolded text to see what was added:
- Haters gonna hate! This funny trump tee is the perfect donald trump shirt for any conservative or republican who loves seeing liberals get up in arms about the president. Show that you are a trump supporter and the cause by rocking out this political gift tee today!
- Funny Haters Gonna Hate Donald Trump T-Shirt President Tee makes a great gift for friends and family. Show your activism for trump 2020 by wearing this design so that you can proudly say trump is my president!
and there you have it! With just a single sentence and a few slight changes, we have optimized the bullet points to include some extra keywords that other designs are pulling in the sales with.
The next step would be to change these on Merch by Amazon and then watch your ranks inside of the Merch Tracker every day. I would personally give them about a month or so to see some movement. After 30 days, you may wish to revisit your design, or start looking at putting some ad spend behind your shirt!
Wrapping It Up
This method DOES require a little bit more effort – about 5 minutes more.
However, if merchers actually took the time to optimize their account and keep tabs on their designs, they would easily grow with the platform and see increased sales.
All it takes is a few minutes a day or one big day of optimizing to start seeing some returns. After all, it takes a while to get ranked, but even if you are ranked, you could STILL be missing out on some of that Merch Money.
Let me know if you have any questions or how we can help you to optimize your designs even easier in the comments below!
To your success!

Knowing Your Print on Demand Numbers Is Crucial
Knowing Your Print on Demand Numbers Is Crucial

This post is also available in: German
Lots of people in the POD (print on demand) community are spreading out to other print on demand services. This is a great way to increase the amount of revenue streams you have for your business and is something that you SHOULD be doing. For most, one of the biggest steps is moving onto Etsy! However, there is one GLARING problem I keep seeing pop up over and over again….
No one knows their numbers!
This is apparent with both AMS ads (with sales on Merch by Amazon) and running ads on Etsy. You see big number screenshots, think you are doing great, making sales… life is good. Or so you thought!
I was talking to an Etsy seller the other day that was doing around $800 per month starting out with their first few designs live.
This all looks great on paper, but this seller never actually took the time to run the numbers of what they were bringing in for profit. Let’s go through what you need to do.
Running Your Print on Demand Etsy Numbers
First:
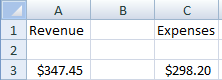
Go to your finances page in Etsy to see the daily sales and open an excel spreadsheet at the same time. Make 2 columns in excel. One of them will be your revenue generated, and the second one will be your expenses.
On your finance page in Etsy, add up your sale amount for each day, add this to the first column. This is your revenue.
Next:
You will see 4 things: listing fee, shipping transaction fee, sale fee, then sale transaction fee. Write these 4 fees down as they are EXPENSES.
If you are using Printful, head over there and look at the daily cost for whatever day you are writing down. Look at the Printful fulfillment costs (this includes taxes and shipping). Write this down in the second column as these are EXPENSES that you paid to Printful to fulfill and ship your orders out to your customers.
Finally:
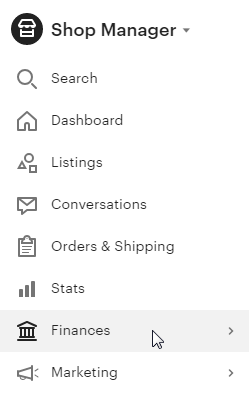
Head back to Etsy, and go to your marketing tab if you are running sponsored ads. Add the daily spend to your spreadsheet as this is an EXPENSE that you are paying to Etsy.
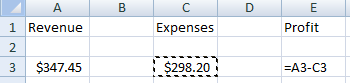
Calculate Profit
Now that you have your spreadsheet filled out for a single day, do the math. Take your total revenue for the day, and subtract all your fees. The total should go in a new column and THIS is your PROFIT!
Do this each and every day (not weekly, not monthly, every damn day!). This data will show you exactly how you are performing and not leave you guessing how well your business is running.
In terms of the person I was talking to, their $800 dollars on Etsy per month actually ended up being a $40 loss for the month. They were essentially paying money for people to buy their shirts (instead of the other way around). This could have all been avoided if they ran their numbers daily.
Make Some Etsy Tweaks
This is especially important if you are running Etsy ads. Once you have run your numbers, you should also go back through and edit keywords, edit pricing, and titles. This is going to be extremely important to getting your system up and running properly where you are turning a profit each and every day.
Let’s talk about tweaking Etsy ads:
Go into your dashboard and look at the performance of your ads.
Start your ads at a low CPC (cost per click). I would not start them anywhere above 10 cents per click.
You want to take a look at your stats once your ads start running. If a particular product is getting a lot of impressions and clicks, but resulting in poor sales, turn off that listing.
If you are spending $10 to make a $25 Etsy sale, you might think you are making money. Once you run the numbers, after fees and fulfillment costs, you are actually LOSING money. Turn those ads off!
If you are going to run paid traffic, you MUST stay on top of it every day. If you do, you can optimize the ads properly to turn into an absolute money machine. If you are not going to stay on top of your paid traffic and just eyeball how you are doing, do yourself a favor and just turn them off!
Wrapping It Up
After reading this article if you still do not know your exact numbers and your exact profit after expenses are taken out, there is a problem!
You really cannot just rely on eyeballing it and winging it when running a business. You have to know your numbers and you have to constantly be testing and optimizing so that you can get the best out of your campaigns.
If you have ever had a good month, or thought you had a good month and the numbers said otherwise we want to hear about it! Drop your stories in the comments below.
Top rated products
-
 Short-Sleeve Unisex T-Shirt "Your read my t-shirt"
$10.00 – $13.50
Short-Sleeve Unisex T-Shirt "Your read my t-shirt"
$10.00 – $13.50
-
 Short-Sleeve Unisex T-Shirt "There are 10 types of people"
$10.00 – $13.50
Short-Sleeve Unisex T-Shirt "There are 10 types of people"
$10.00 – $13.50
-
 Short-Sleeve Unisex T-Shirt "Sorry for what I said while gaming"
$10.00 – $13.50
Short-Sleeve Unisex T-Shirt "Sorry for what I said while gaming"
$10.00 – $13.50